
主题
潇然 PE 启动高级使用 - 2.进阶篇 - 2.3.OpenWrt 网启服务器
OpenWrt 是一个开源的路由器系统。如果您有使用 OpenWrt 的路由器,可以参考本文配置 TFTP 和 Dnsmasq,配置完后无需启动盘,只需插网线,即可重装各种系统。
下面将演示在 ImmortalWrt 23.05.3 主路由上配置网启服务器的方法。
UI 配置
将 iPXE 相关文件下载到 OpenWrt 上,这里使用 SSH 执行命令,如果不会用的话,可以使用 LuCI 相关 APP 上传
shell# 新建 pxe 文件夹,用于存放TFTP引导文件 mkdir -p pxe cd pxe # 下载 Legacy Boot 的 iPXE wget https://c.xrgzs.top/ipxe/core/bin/undionly.kpxe # 下载 UEFI Boot 的 iPXE wget https://c.xrgzs.top/ipxe/core/bin-x86_64-efi/ipxe.efi # 显示当前目录,复制下来,备用 pwd # /root/pxe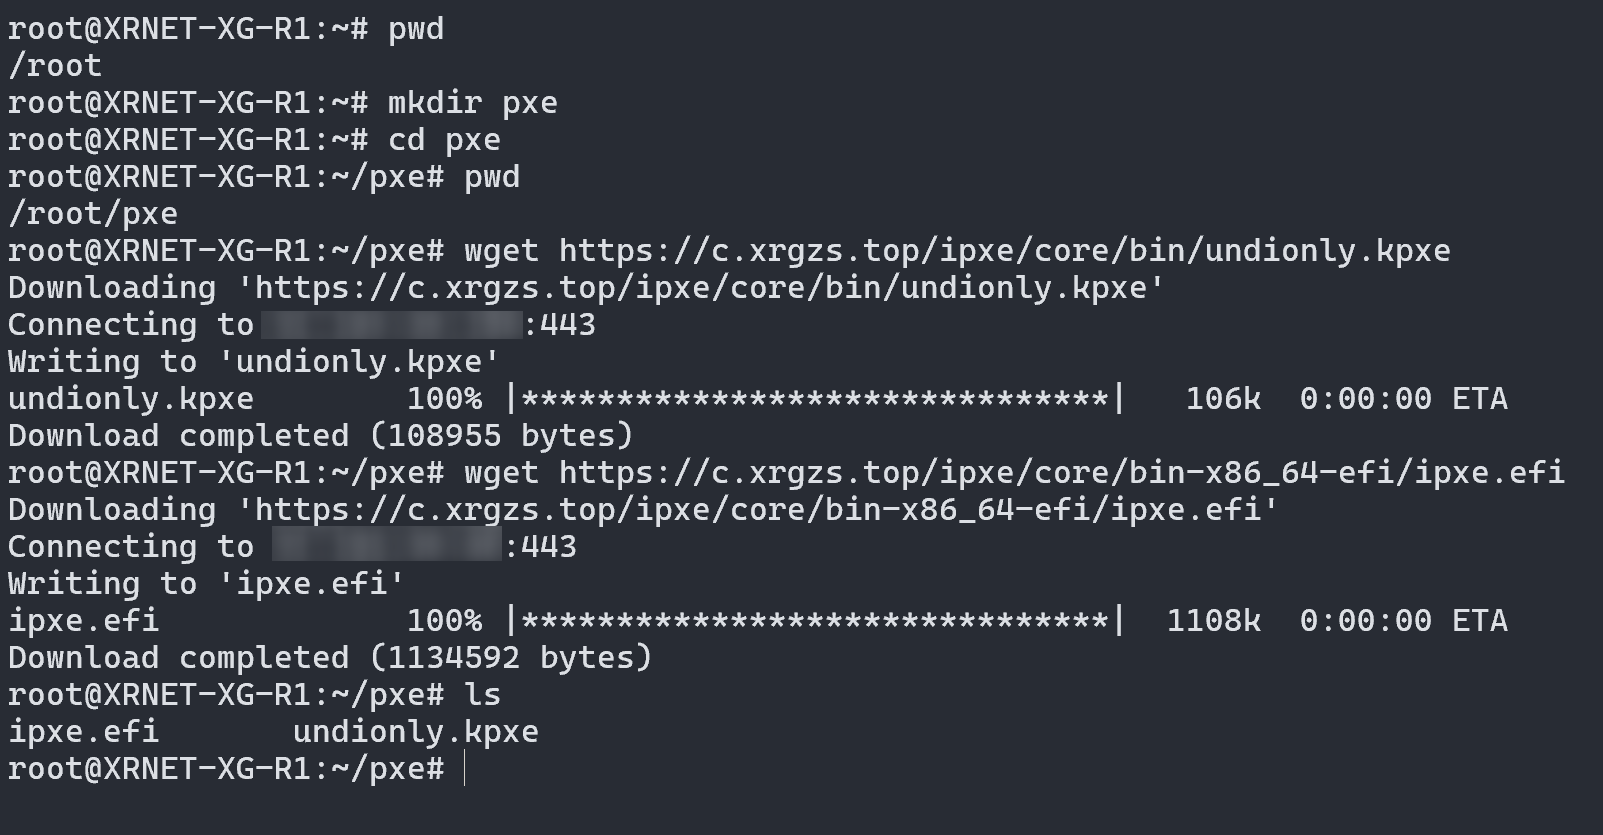
进入 OpenWrt 的
网络->DHCP/DNS(Dnsmasq) 设置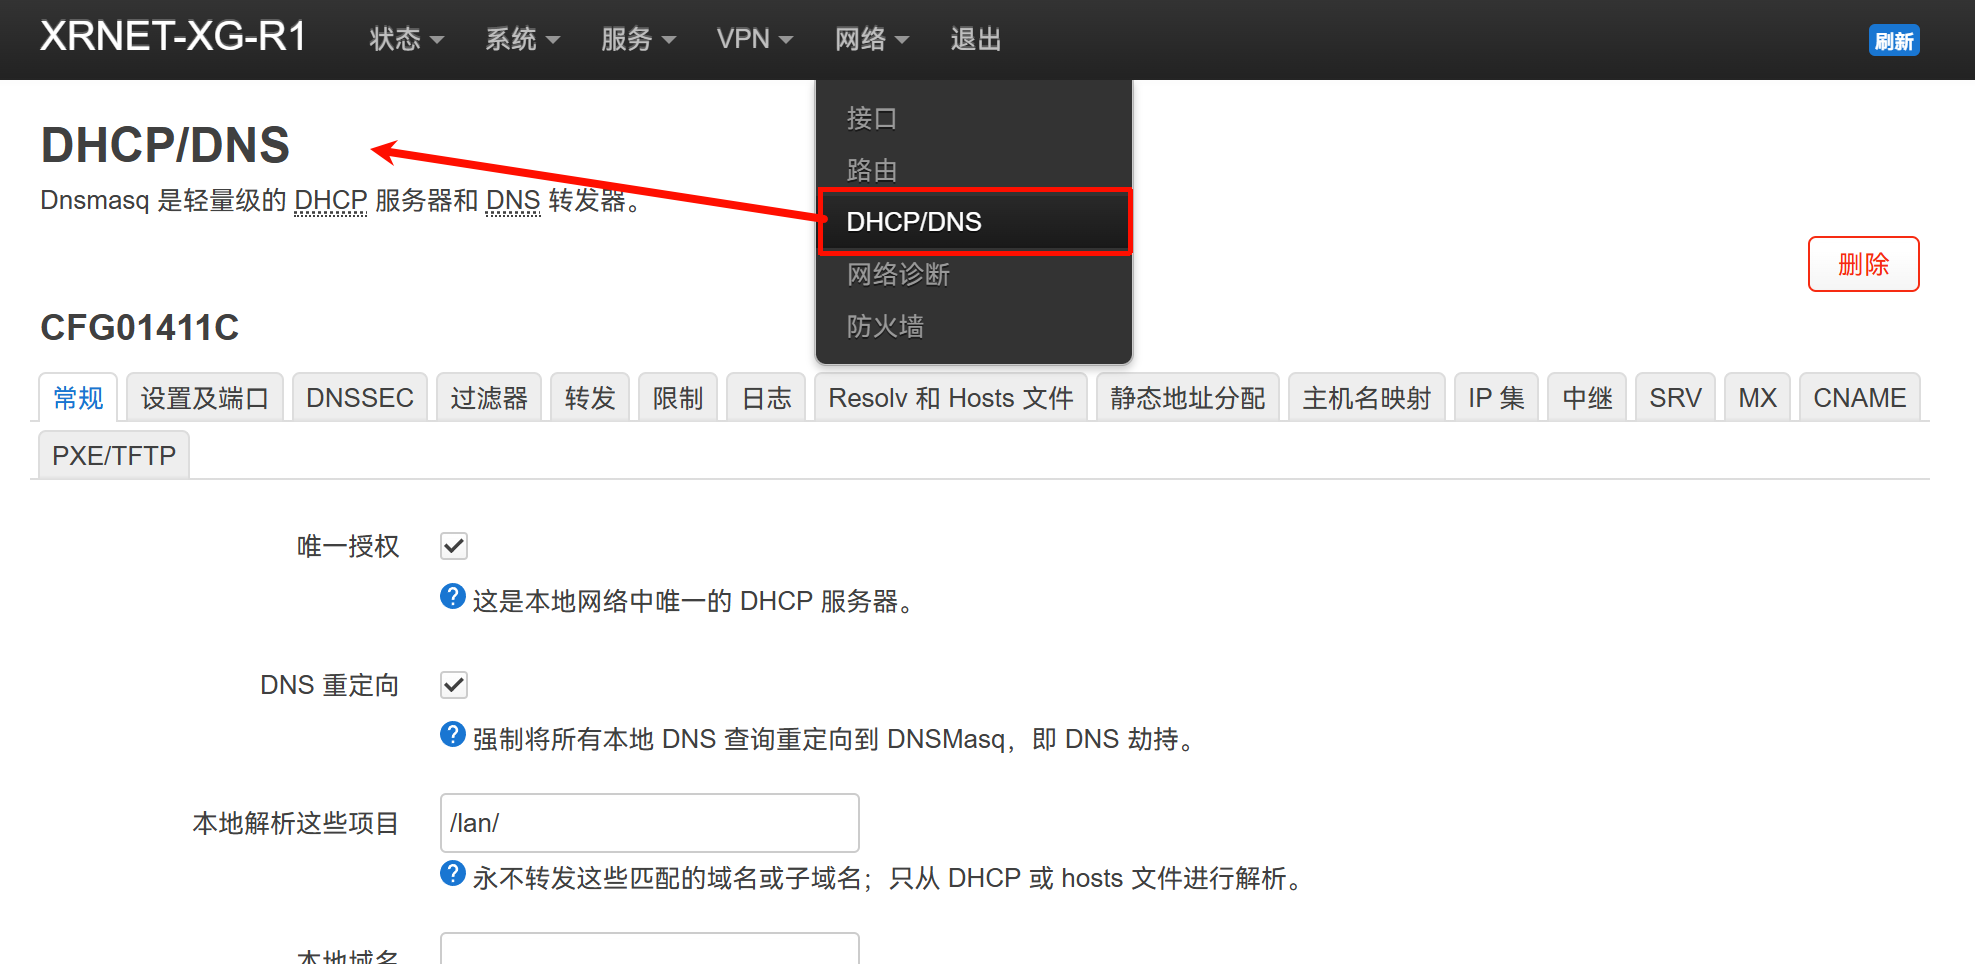
进入
PXE/TFTP选项卡,勾选启用 TFTP 服务器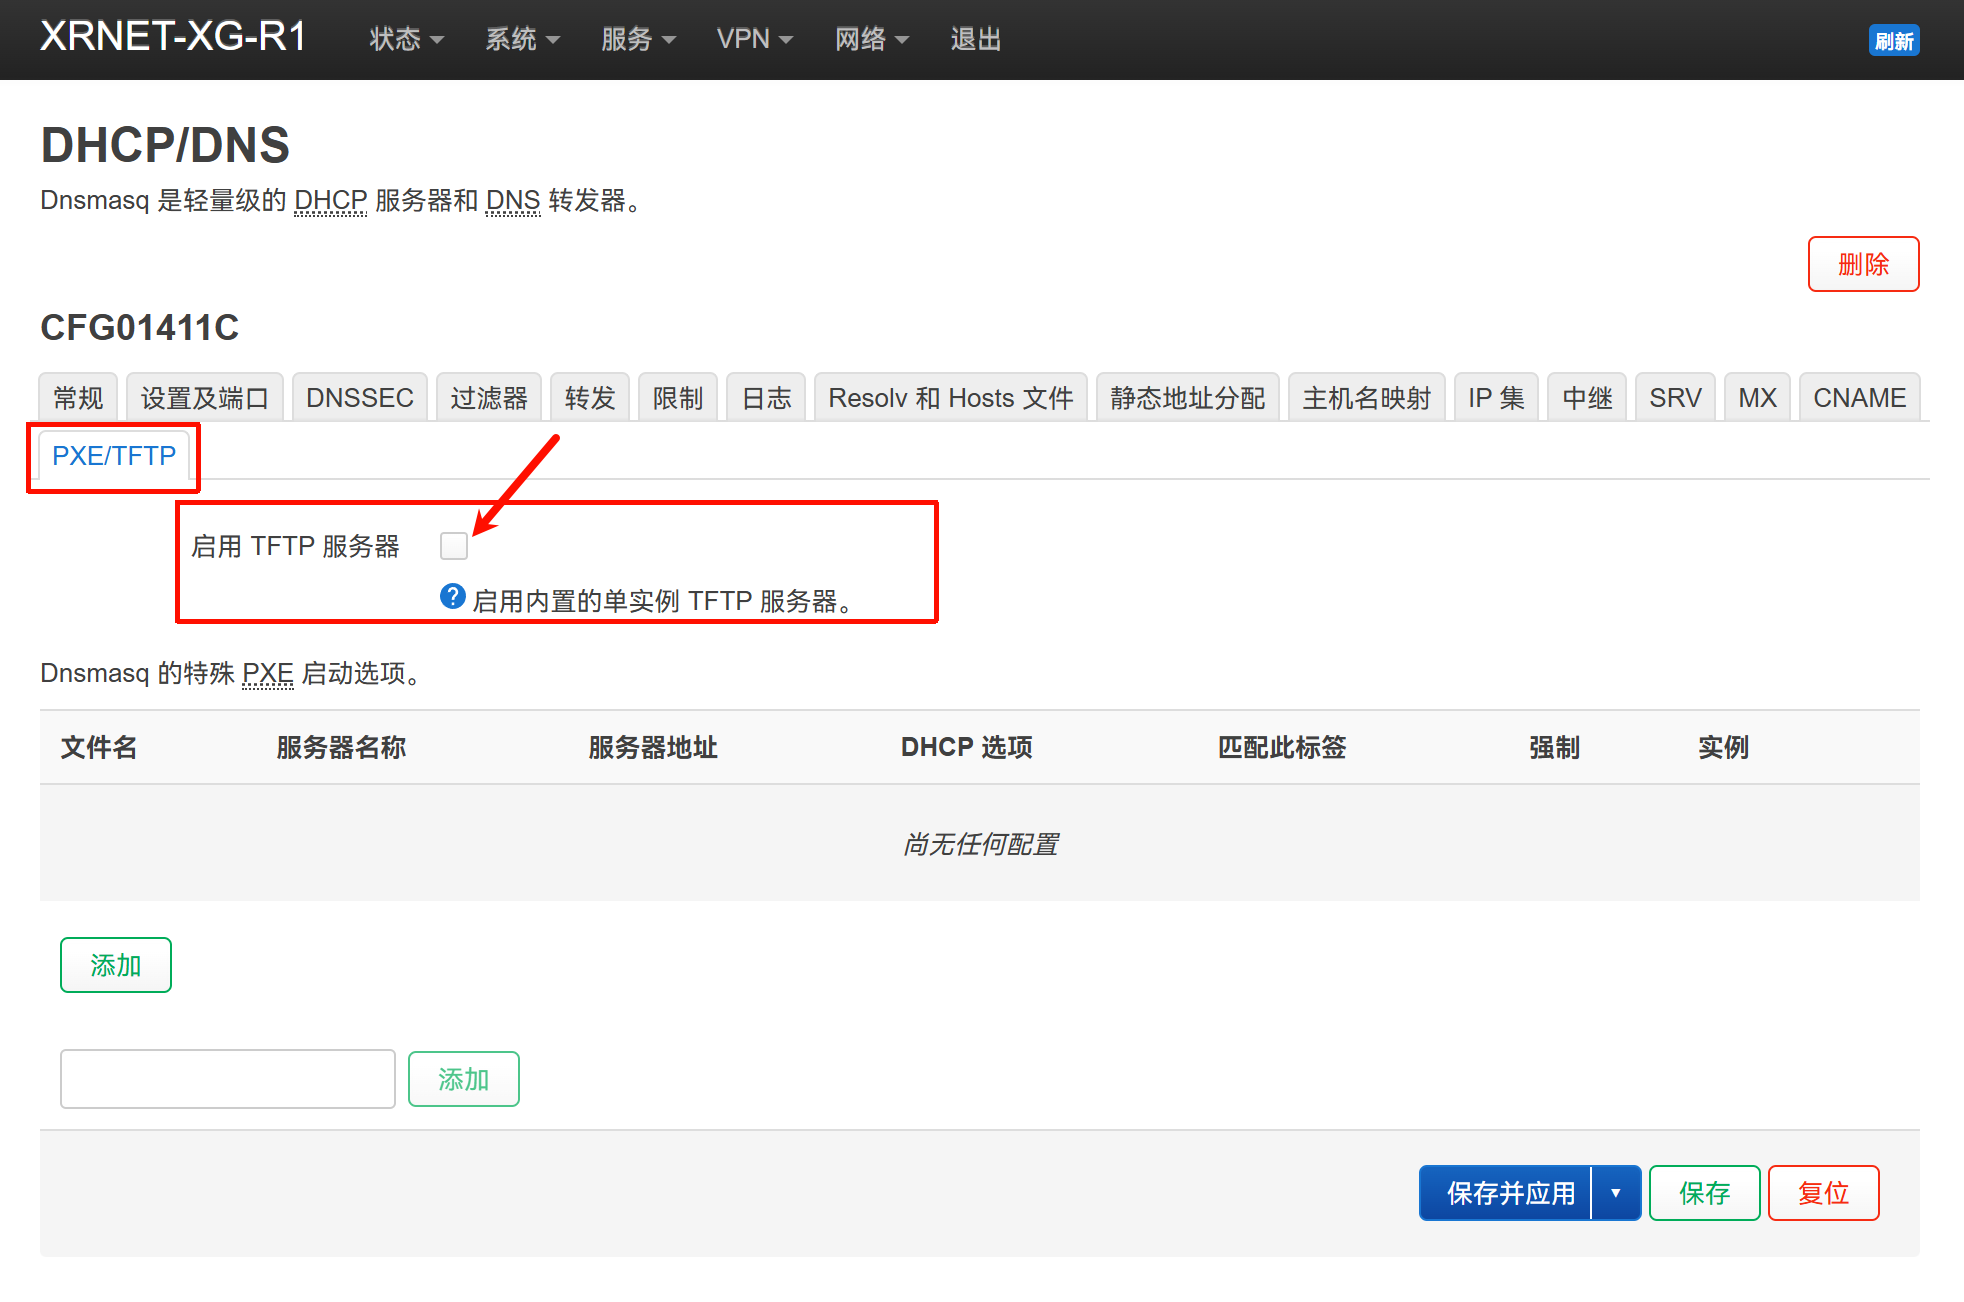
填写
TFTP 服务器根目录为刚才下载的目录,网络启动镜像的话,如果您的客户端使用 Legacy Boot,填写undionly.kpxe,如果您的客户端使用 UEFI Boot,填写ipxe.efi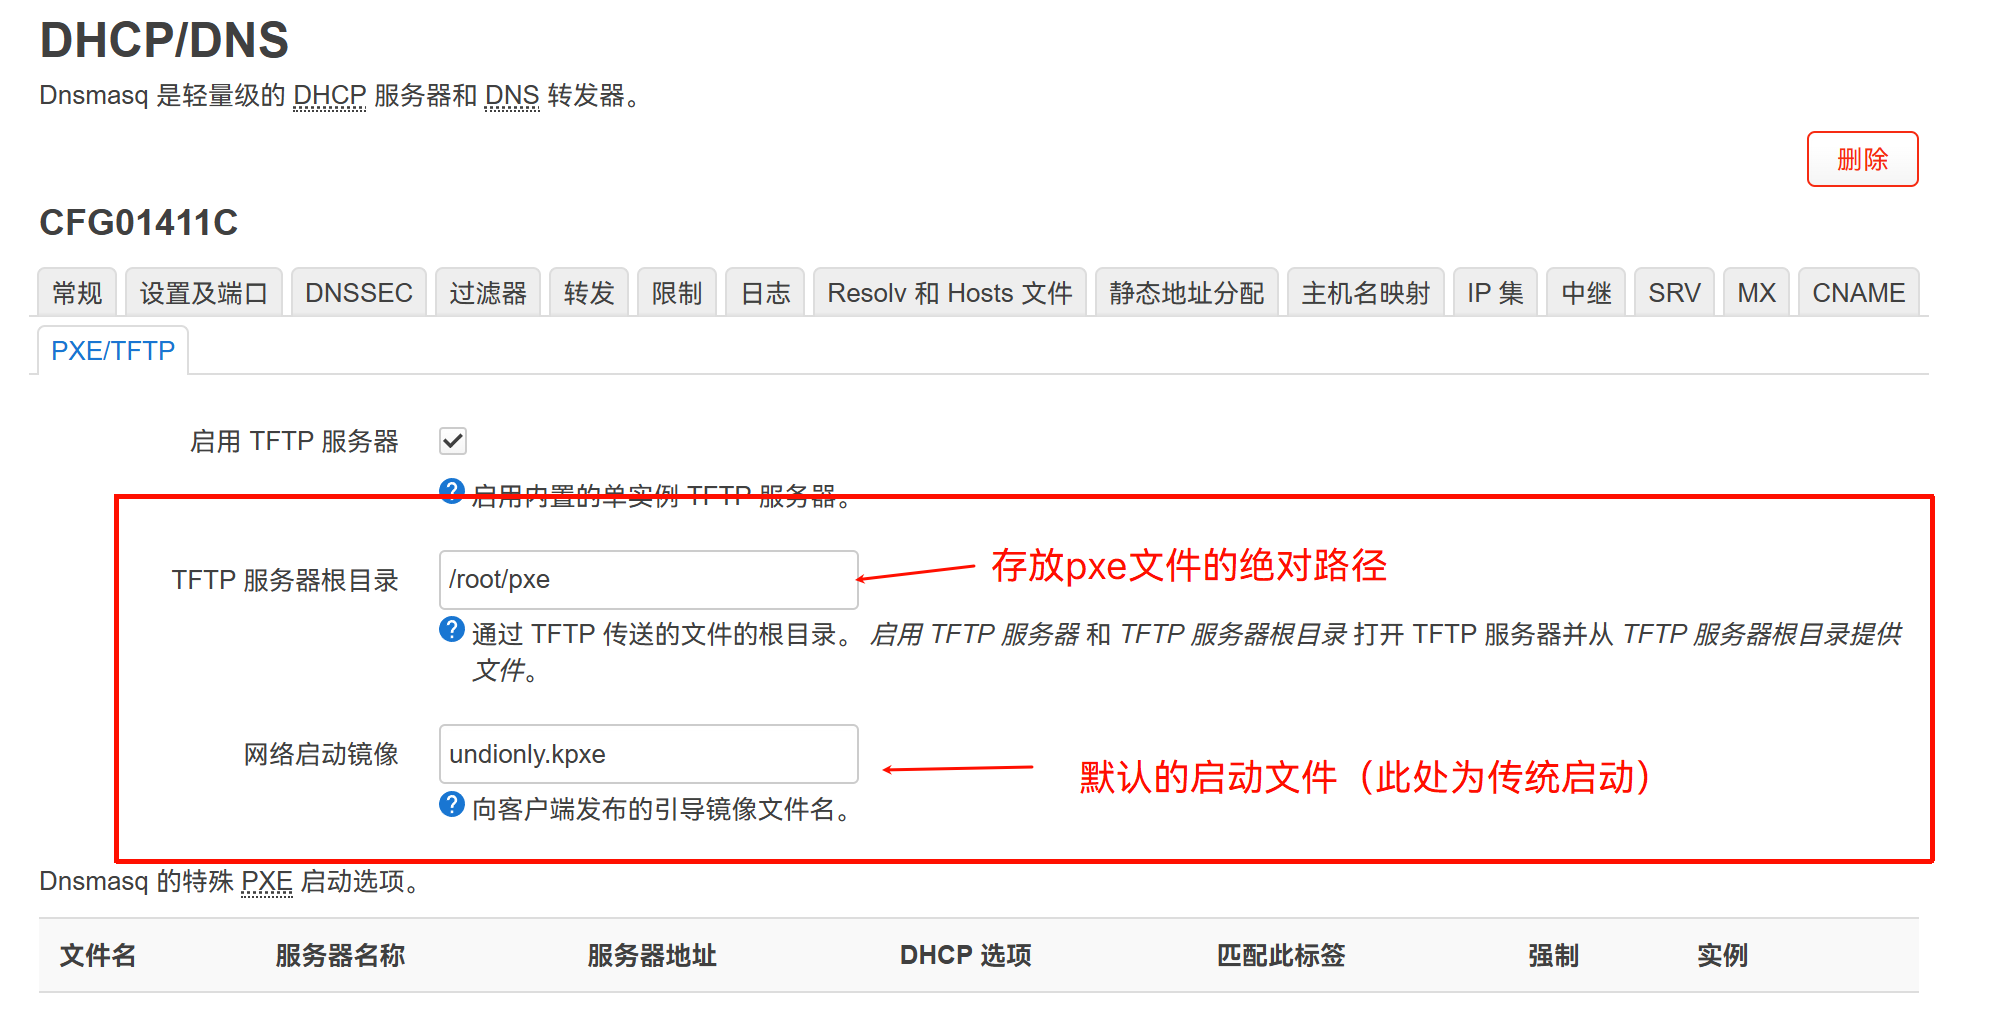
点击下方的
保存并应用即可
多架构自动匹配
上面介绍的方法虽然简单,但不能自动匹配客户端的启动类型和架构。这种事情对于其它路由系统是无解的,但 OpenWrt 就可以实现。
由于我的 LuCI 没有 匹配 项,只能使用脚本或者改配置来设置,参考:https://openwrt.org/docs/guide-user/base-system/dhcp_configuration#multi-arch_tftp_boot
shell
# uci set dhcp.@dnsmasq[0].logdhcp='1'
uci set dhcp.@dnsmasq[0].enable_tftp='1'
uci set dhcp.@dnsmasq[0].tftp_root='/root/pxe'
uci add dhcp match
uci set dhcp.@match[-1].networkid='bios'
uci set dhcp.@match[-1].match='60,PXEClient:Arch:00000'
# uci add dhcp match
# uci set dhcp.@match[-1].networkid='efi32'
# uci set dhcp.@match[-1].match='60,PXEClient:Arch:00006'
uci add dhcp match
uci set dhcp.@match[-1].networkid='efi64'
uci set dhcp.@match[-1].match='60,PXEClient:Arch:00007'
uci add dhcp match
uci set dhcp.@match[-1].networkid='efi64'
uci set dhcp.@match[-1].match='60,PXEClient:Arch:00009'
uci add dhcp boot
uci set dhcp.@boot[-1].filename='tag:bios,undionly.kpxe'
uci set dhcp.@boot[-1].serveraddress="$(uci get network.lan.ipaddr)"
uci set dhcp.@boot[-1].servername="$(uci get system.@system[0].hostname)"
# uci add dhcp boot
# uci set dhcp.@boot[-1].filename='tag:efi32,efi32/syslinux.efi'
# uci set dhcp.@boot[-1].serveraddress="$(uci get network.lan.ipaddr)"
# uci set dhcp.@boot[-1].servername="$(uci get system.@system[0].hostname)"
uci add dhcp boot
uci set dhcp.@boot[-1].filename='tag:efi64,ipxe.efi'
uci set dhcp.@boot[-1].serveraddress="$(uci get network.lan.ipaddr)"
uci set dhcp.@boot[-1].servername="$(uci get system.@system[0].hostname)"
uci commit dhcp
service dnsmasq reload
执行完成后即可看到已增加相关设置项。这里的 tag:xxx 不能手动填写,因为没有 match 选项卡,只能用命令刷。

这里我们可以 cat /etc/config/dhcp,发现里面是有相关设置的,也可以手动填写然后重启服务实现,以下为不完全配置:
conf
config dnsmasq
        ...
        option enable_tftp '1'
        option tftp_root '/root/pxe'
        option dhcp_boot 'undionly.kpxe'

...

config match
        option networkid 'bios'
        option match '60,PXEClient:Arch:00000'

config match
        option networkid 'efi64'
        option match '60,PXEClient:Arch:00007'

config match
        option networkid 'efi64'
        option match '60,PXEClient:Arch:00009'

config boot
        option filename 'tag:bios,undionly.kpxe'
        option serveraddress '10.0.0.1'
        option servername 'XRNET-XG-R1'

config boot
        option filename 'tag:efi64,ipxe.efi'
        option serveraddress '10.0.0.1'
        option servername 'XRNET-XG-R1'